DIY: How to do Brown Paper Floors
I posted some pics on my personal Facebook profile of our new flooring and I had several friends ask me for more pics and details about how to do brown paper floors. Since we took several pictures of the process, I thought I’d tell you about it.
We chose this for a couple of reasons… primarily because we wanted a budget friendly solution. It cost us less than $115 for the whole room (300 sq ft) and we have supplies left over. That’s like $.39 per square foot plus labor (which is free when you do it yourself!!).
Also, we really like DIY projects and this one definitely seemed doable for us. I had found the idea more than a year ago and bookmarked it, then read the posts linked below plus the hundreds of comments and suggestions and after researching, I really, really wanted to give it a go! I figured it’s cheap enough that if it doesn’t work out, we haven’t lost all that much!
I’m going to share our steps and some details and if you have questions, I’ll do my best to answer, but I highly recommend checking out the two posts below (and the outgoing links from them) – those are the two major resources we used as guidance for doing this!
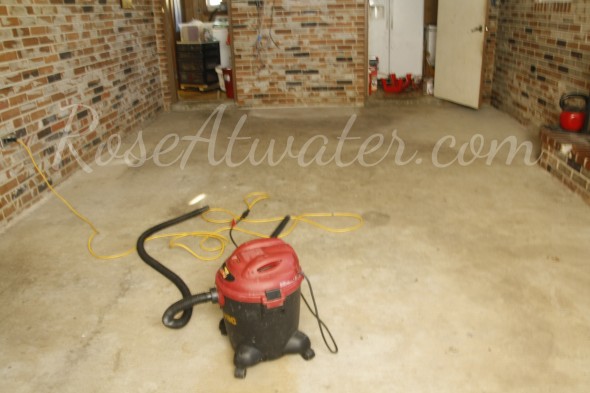
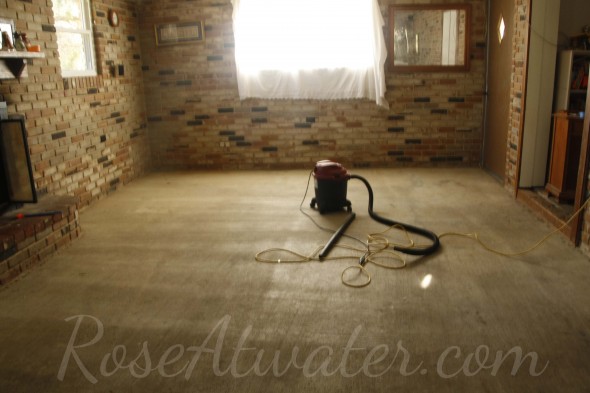
Okay – so a little background. This room is approximately 300 square foot. When we moved into the house, it had very old, nasty brown carpet in this room. We eventually pulled it up (after we transitioned from renters to owners) and for quite some time, we had plain concrete floors.
Thank goodness they didn’t have any glue to clean up, so we just scrubbed it down a couple of times with hot soapy water, then swept and vacuumed.
This is what they looked like minus all of our furniture and other junk (sorry about the blur):
The first thing we did is order/buy supplies (all recommended here):
- Elmer’s Glue-All (by the gallon)
- Brown Kraft Paper
- Deck Pads
- Water-based Polyurethane
- Wood Stain
- Concrete Filler
After it was clean, my husband patched the holes where the carpet tacks were along the edges.

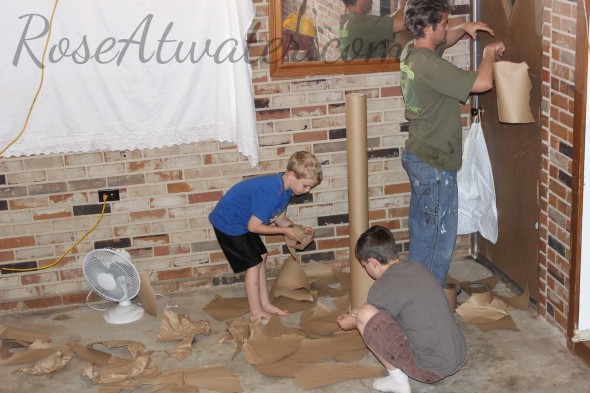
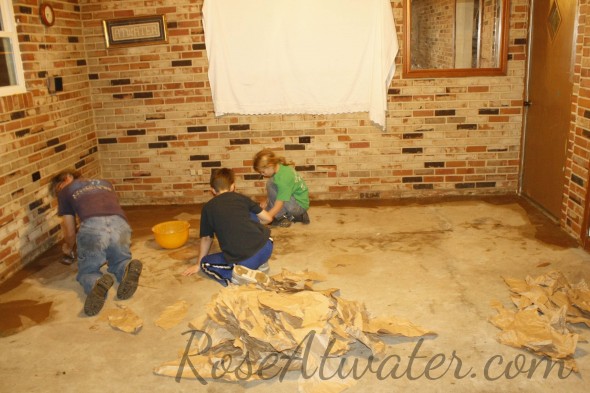
Oh, and we had to tear up the paper and wad it and flatten it again. We did this a few days before starting and let the kids help – they had a blast!
There was a couple of days between this and starting – my new niece was born that week, so of course, we had to focus on what was most important!!
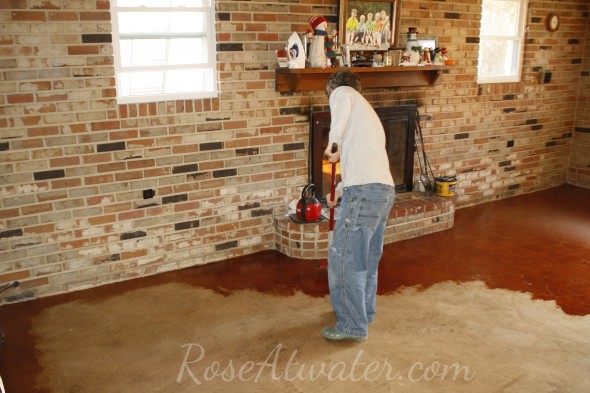
But our next step was to jump in and get started. OH – let me state here that our floors are not/were not perfectly smooth. This part of our home used to be a carport. We left them rough and opted to not sand them… only time will tell if this was a bad decision.

Anyway, so step one, we mixed the glue with water. My husband did not measure, he just did it by “feel”, so I cannot tell you what ratio to use – just reference those posts above for that info!
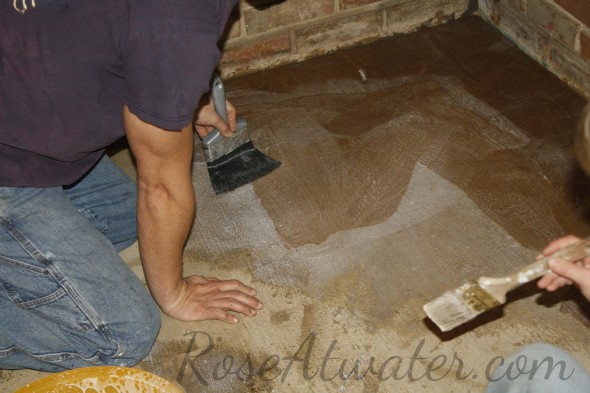
So – water and glue. We started in the far corner and used a paint brush to paint the floor, and both sides of the wrinkled paper, then we just laid it down and smoothed it out, brushing over it with the paint brush.
Hubby did lots of edges around one end of the room, then started filling it in.
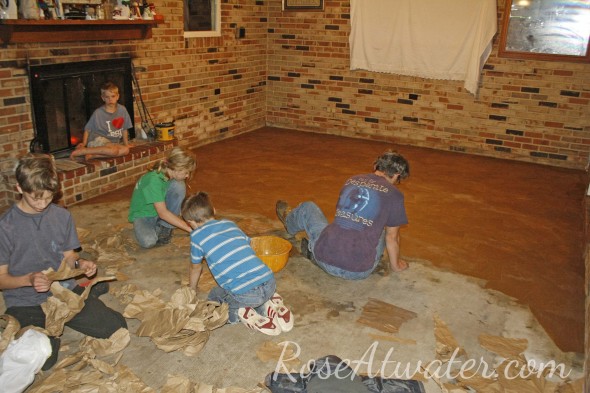
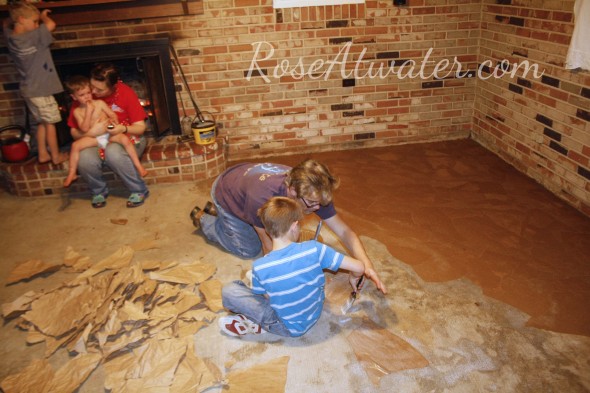
The kids were able to help with some of this too. We made sure to overlap the pieces of paper (they shrink when they dry) and tried to avoid any straight lines except at the walls.
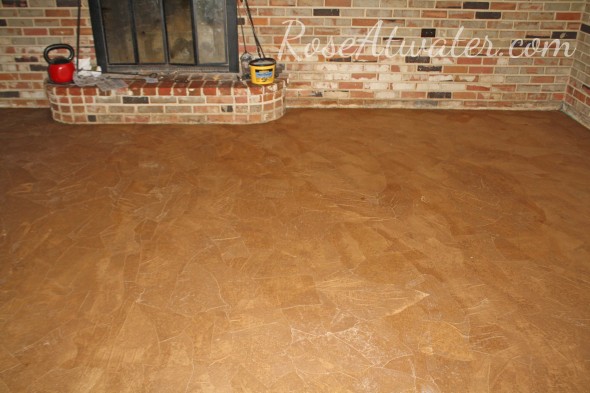
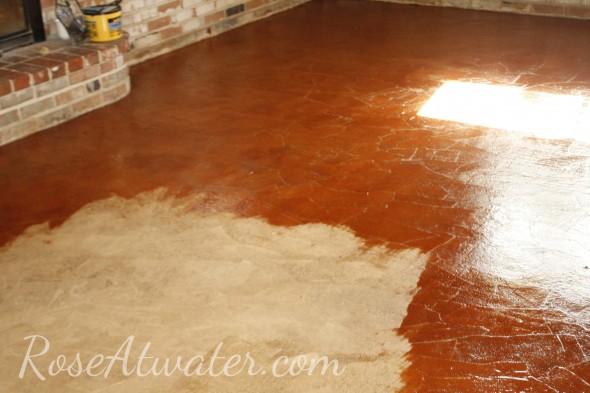
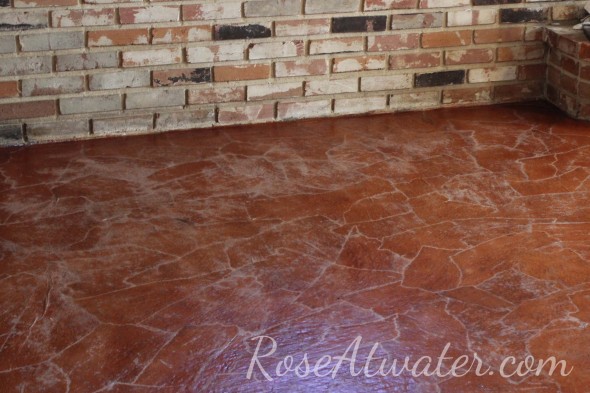
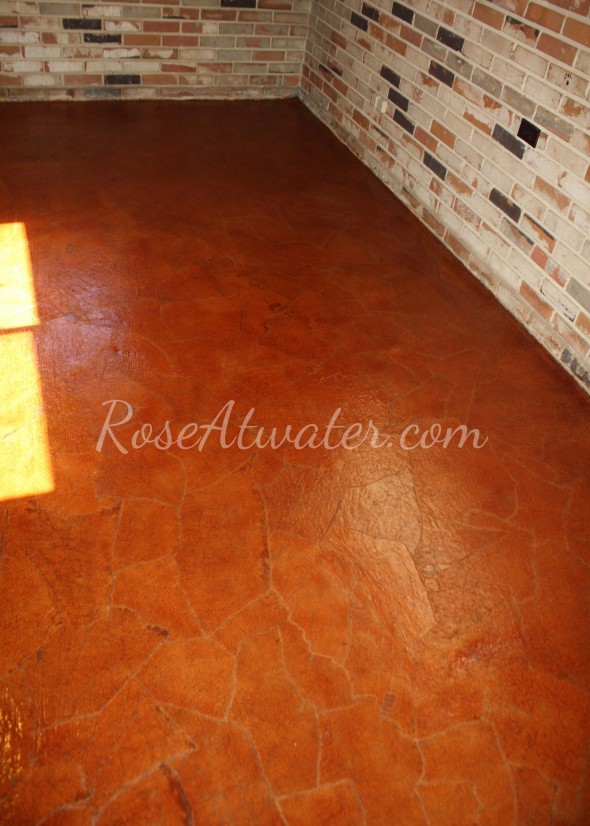
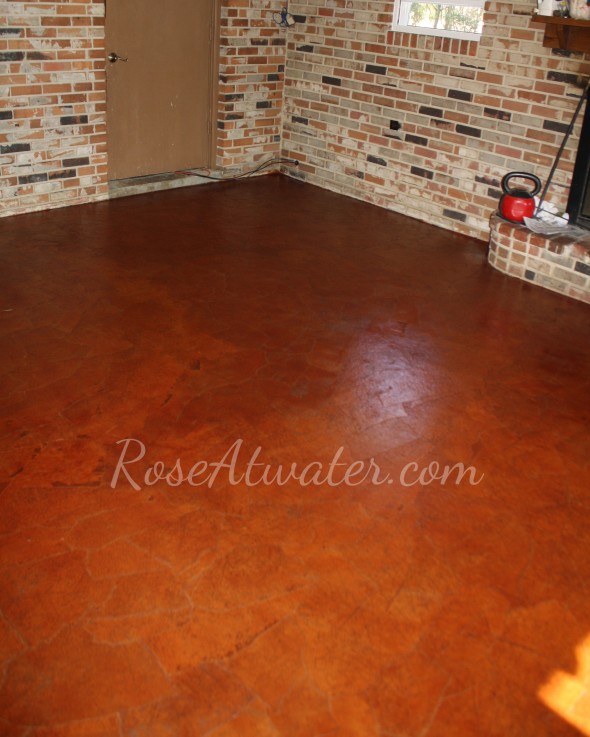
This is what it looked like when the room was finished (but still wet). It took about 12 hours (I think) to do this 300 sq. ft. room with all of us working / taking turns:
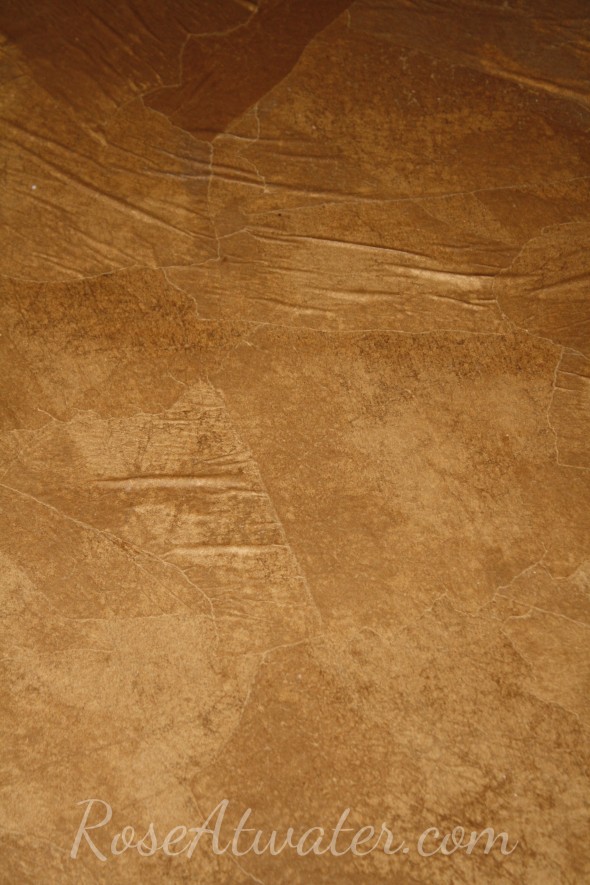
The above pic is a close-up. Most of those wrinkles smoothed out when it dried… and below is a bigger picture.
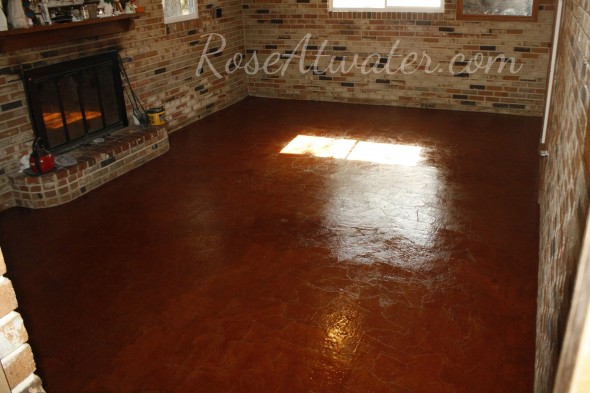
Then this below is after it dried (the next morning):
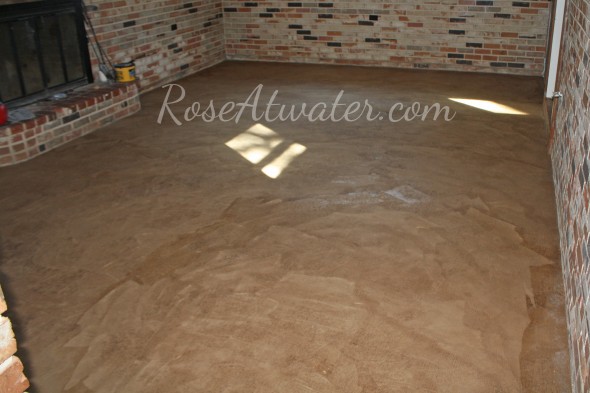
In this corner closest to me here, you can see that there was sort of this circle that looked different. That’s where we stopped/started working through the night and when we were finished, we were really worried that it was going to look terrible. But as you’ll see below – it turned out just fine (keep scrolling)!
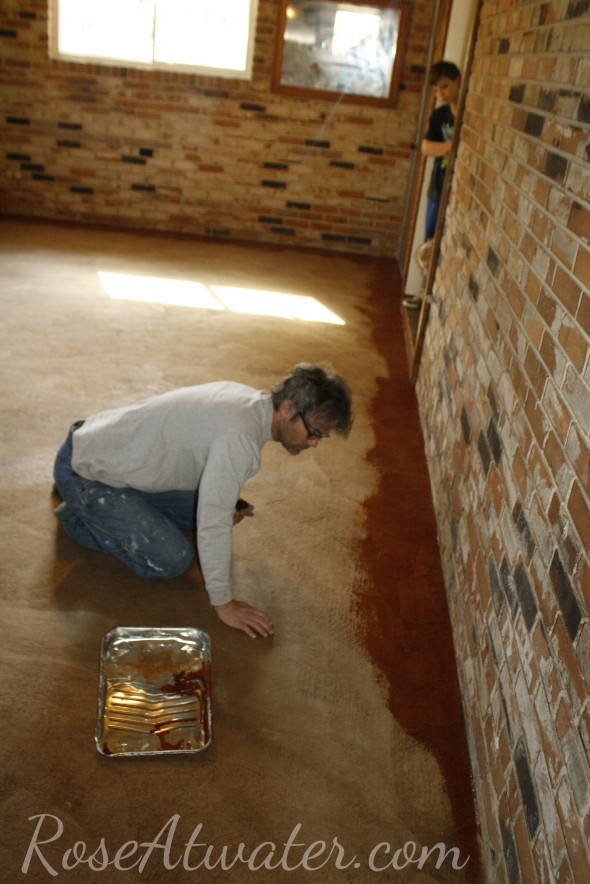
The next step was staining. The hubs first used a brush to paint the edges of most of the room, then he used the deck pad (on a mop handle) to mop on the rest. I think it took about 2 hours total.
When it was all finished… we had to wait.
And wait.
And wait some more. I think it was close to 36 hours before the stain was dry.
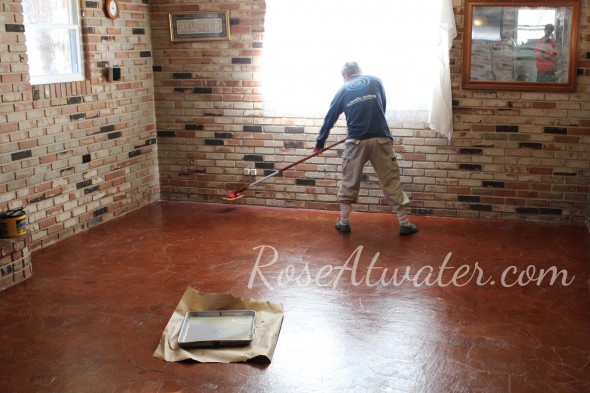
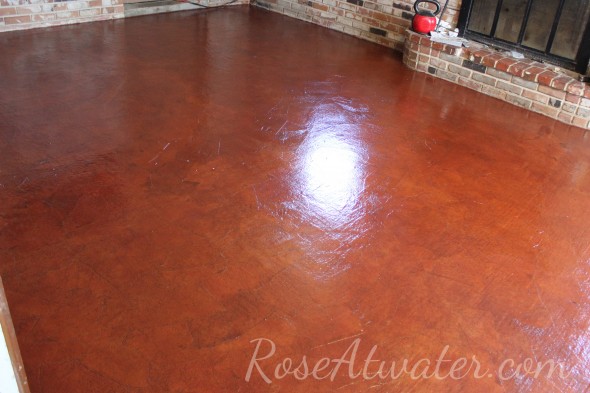
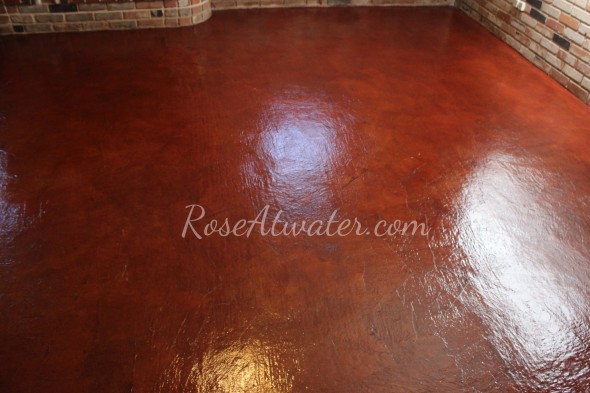
Next – we put on polyurethane. It is actually recommended in one of the posts that you do 12-14 coats but we only did 10. A few spots started to get cloudy on the last couple of coats so we stopped.
We may regret not doing more… but I hope not. Oh, and if you’re wondering, we also mopped it on with the deck pad (a fresh one), then we’d let it dry at least 1-2 hours, then do another.
Because of interruptions and kids and fun things like that – it took us just over 2 days to get all the coats on and feel ready to move furniture back in.
But first let me tell you about our one little hiccup. After the first coat, a lot of it turned white. Icky, ugly white. For a moment I panicked, but thank goodness I remembered that this problem had been addressed over at one of the posts linked above.
So we stained again (as recommended), waited, waited, waited some more (no pics here), then started over with polyurethane. This time – it worked beautifully! It took just under 3 days to get all the coats of polyurethane done and 5 days from start to finish on the whole project.
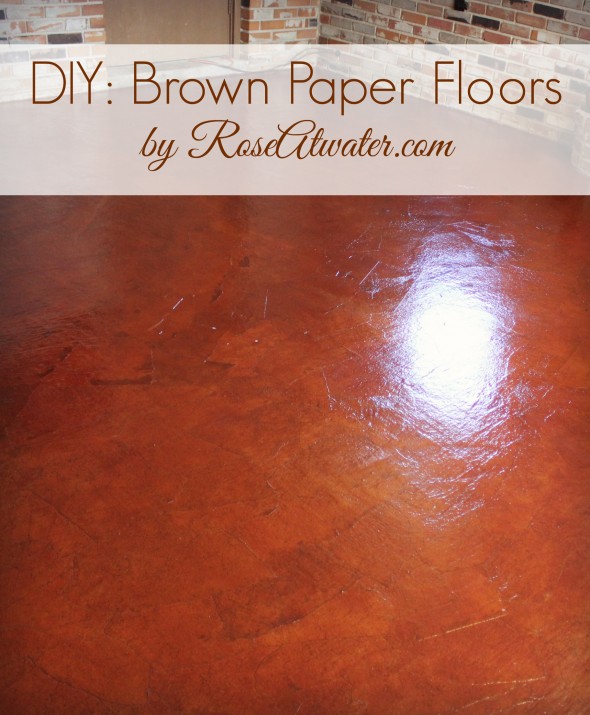
Here are the finished pics below – from a couple of different angles and different lights. We absolutely love the floors so far.
Remind me in a year to update (January 2015!) and let you all know how it’s holding up with 6 kids, dump trucks and Hot Wheels cars, the fireplace, etc. Ha!
What do you think? Is this something you’d try?


It looks beautiful. We are down to the last room in our home. We have done this in most of our house. We have gotten creative in a couple of rooms with designs of different colored stains. We did a light colored large ‘sun’ design on top of dark colored stain. And in bedroom we made it look like large tiles with small diamonds between. Almost looks like stained concrete. We love it!
Any way you could send me pictures of your designs and how you changed the colors. this sounds amazing.
Was wondering how the bag floor was doing??
My son and I are thinking about doing this to a home he is in and thinking about buying. The carpet NEEDS out.
Maggie
They’re doing great! I wish we had put on a few more coats of polyurethane because it’s a very high traffic room for us, but overall we have not regretted it for a minute!
What color of stain & brand did you use? I LOVE the color!
Thank you Mandi! We used MinWax brand and the color Gunstock (or Gun Stock?).
I had heard of this inexpensive solution to a bare floor. Do you think that the paper could be cut in large strips to resemble hard wood flooring? Just an idea.
Yeah, I don’t see why not!?
I’m seriously wanting to try this in my living room/dining/kitchen opened area. BUT, I’m a nervous wreck. I found your post and wondered how you’re feeling 2 years down the road. 😉 my biggest concern is that it is 3 primary areas of our home: Front door, back door, kitchen, 2 kids, 2 dogs, 2 cats…Yeah, nervous wreck!
How do you feel it’s held up? What changes have occurred over the 2 years? What about the sealer holding up? Any recommendations to do anything differently? Thank you so much!!!
Hi Ashley, it’s funny you ask – we’ve been talking about it quite a bit lately. We have a couple of places that have torn and come up but I don’t think it’s due to the technique, but rather that the concrete we laid the paper on was not smooth in the first place. The places that have torn are places where the concrete was especially rough so the traffic on top of it simply wore the paper down faster. Everywhere else has held up just fine other than getting dull. We’re considering patching those places that are torn and putting a fresh coat of stain, then poly over the whole floor again just to shine it up!
I finally ripped my carpet and tile out and I have spaces between my plywood. Some are about 1/4-1/2″ wide…suggestions for these areas?
Thanks so much for answering!
Oh goodness – I don’t know!
How is the floor holding up on the concrete? I was thinking about putting this in my basement, but I live in an area with a lot of humidity and the basement can be humid and/or damp. Have you had any issues with water damage?
Hey Steve – we didn’t have any issue with moisture, but the paper floors didn’t hold up well on some places. Or floor was originally a carport and not smooth. So on the rough spots, the paper quickly broke down in high traffic areas. But in other areas that were completely smooth, it held up beautifully!